
A toy oven for 5 to 7-year-olds simulates cooking with UV lights changing food colors for a realistic experience.
7 weeks
Team
Haiyeng - Project manager, Coder
Alyssa Suba - Researcher
Tessa Board - Documentarian
Jon Crescenzo - Designer
How might we create toys that provide a compelling user experience, capturing young children's attention while encouraging their learning and development?
The goal of the Clickin Chicken toy is to provide children with a fun and educational experience that promotes their learning and development while providing them with a unique interactive playtime experience.
We brainstormed ideas and researched children's toy interests for an engaging experience. The team then landed on the idea of a rotisserie-style toy. After selecting the Clickin Chicken toy, we analyzed related products, generating creative design concepts. We built a prototype using 3D printing, constructed the oven, wired the device, and coded it. Through testing and refinement, we achieved a final design. Our genius-design approach resulted in a unique toy that stands out and sparks children's imagination in the toy oven market.

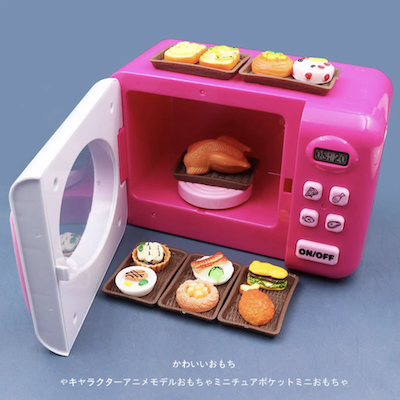
The Play House mini toaster consists of various play food items that children can play with and microwave. It also has buttons and sound components that look and sound like the elements in a real microwave. Despite this, the child has few opportunities to interact and engage with this toy. On the other hand, Clickin Chicken highlights UV color-changing pieces that offer an element of surprise to the toy, enhancing its potential for engagement and interaction with the child.
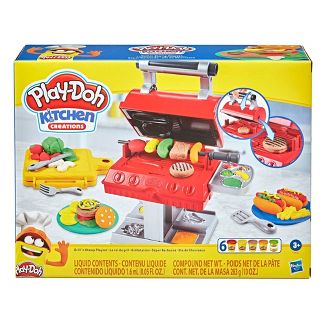
This Play-Doh set stimulates kids' creativity and enables them to make food pieces using their imagination or the included stamp. The playset's parts are intended to replicate a real barbecue grill, giving an authentic play experience. Another essential feature of this playset is the food stamping feature, which gives the child a surprise element. However, this Play-Doh set does not exclude electronic hardware, which some children may find more thrilling in today's world.
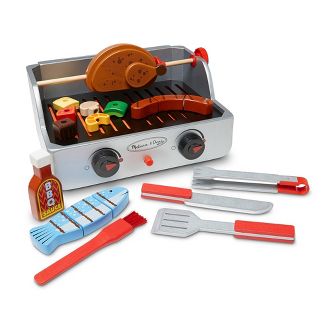
This toy set is designed to simulate a genuine barbecue grill, allowing children to slice and skewer their food pieces. Nonetheless, this toy lacks a surprise component, unlike Clickin Chicken, which features UV color-changing elements.
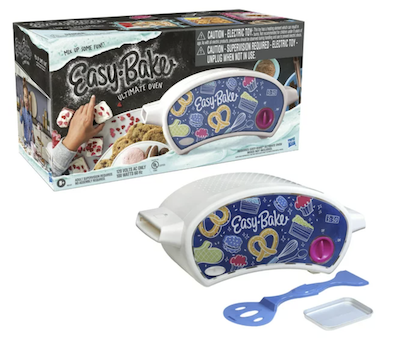
The Easy Bake Oven represents an engaging baking tool that fosters children's creativity and hands-on participation. This compact oven offers a safer baking experience for children, with its design tailored to their safety needs. Furthermore, Clickin Chicken shares some features with the Easy Bake Oven, such as the focus on the oven as the central component of the toy. However, it differs from the Easy Bake Oven in that it is not intended as an edible toy and does not generate heat, which could pose a safety risk for unsupervised play.

1. Clickin Chicken highlights UV color-changing pieces that offer an element of surprise to the toy, enhancing its potential for engagement and interaction with the child.
2. Includes electronic hardware, which some children may find more thrilling in today's world.
3. Has a surprise component which features UV color-changing elements.
4. Not intended as an edible toy and does not generate heat, which could pose a safety risk for unsupervised play.

One of the challenges we faced during the design process was building and designing the oven structure to accommodate various components. 3D-printed toys also needed holes for skewering, leading to unstable supports during printing.


To address these challenges, we refined the 3D-printed toys for sturdiness and child-friendly sizes. We laser-cut multiple box prototypes to find the best fit for toy food and hardware components. We incorporated a motor structure for rotisserie-style rotation.
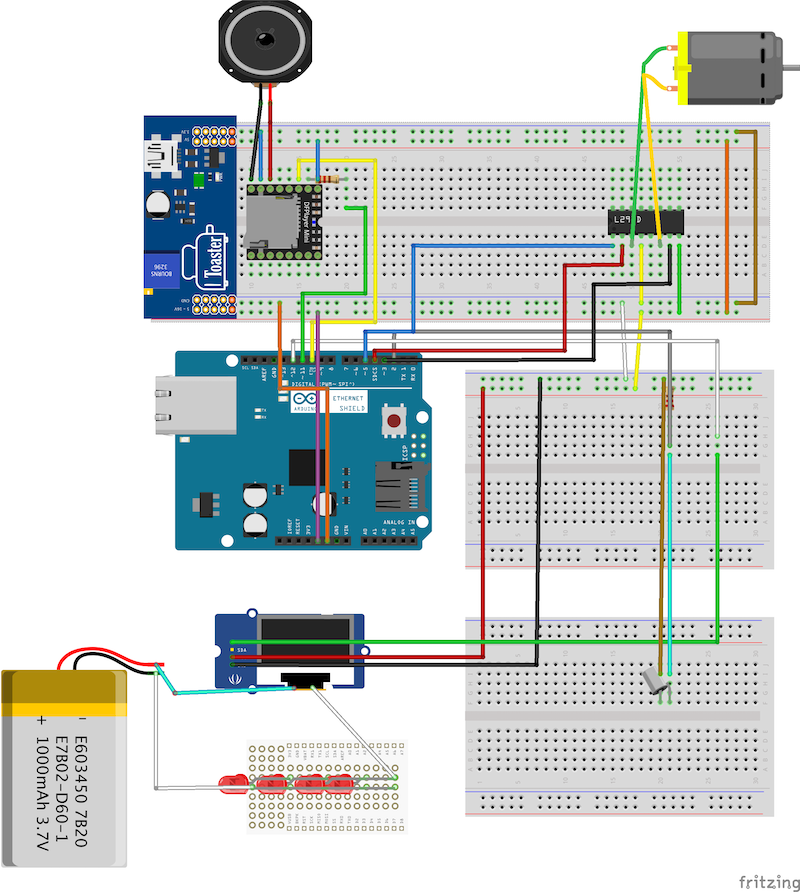
Initially, we used a pressure sensor, regular LED, and DC motor. When adding sound, the MP3 player struggled to play all the effects. Adjusting the volume helped but was inconsistent. Insufficient power to the sensor led to adding an extra power supply, which resulted in damaging the Arduino Uno and sonar sensor.

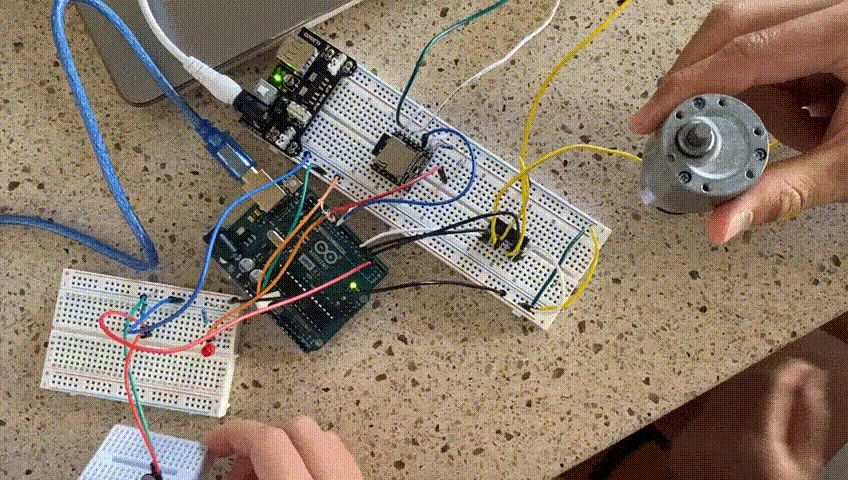
To improve sensor functionality, we switched to a tilt sensor, which better triggered lights and the MP3 player. UV lights required significant power, posing a design and power source challenge. We purchased a 3.7-volt battery to run up to 44 LED light bulbs without resistors.
After placing the hardware components, we discovered that the screwed-in motor did not work. Daisy-chained LEDs malfunctioned due to wire contact and short circuits.


We removed all hardware components and drilled new holes for a different-sized DC motor. To minimize short circuits, we melted hot glue-holding LEDs and cut wires as much as possible.
To get the toy to change color, we purchased UV color changing pigment online. We tested it out with a UV lamp (for nails), to ensure it would work with UV lights.
Next, we added the pigment to white glue. We used white glue instead of white paint as the glue will dry translucent compared to the paint, which would dry opaque.


We then painted the box in acrylic paint
Due to limited time and users being in a vulnerable group, testing was not done for this project.

we have successfully developed a safe and enjoyable toy for children aged 5-7, utilizing components such as Arduino Uno, tilt switch, UV lights, DC motor, and an MP3 module. The final prototype incorporates all necessary hardware. By using UV paint and implementing a short waiting time, we aim to keep children engaged and fascinated by the color-changing process. While we were unable to conduct user testing, we have a proposed plan to involve children in the cooking process and gather feedback. We will continue to refine the design by adjusting light intensity, and motor speed, and exploring different UV paint options. Ultimately, our fully functional prototype spins and transforms the color of 3D-printed foods inside the oven.
Incorporating the different hardware and ensuring the Arduino was able to supply enough power
1. Incorporate a potentiometer to control the intensity of lights and the speed of the motor
2. Experiment further with pigments and power to ensure the LEDs can effectively change the color of the 3D-printed objects within a single cooking time
3. Explore the option of using non-toxic UV paint, allowing children to paint various food items themselves
4. Develop add-ons with different food options
5. Seek IRB approval